We assume that you have a ready picture that you would like to place in your Blogger Header. Edit the picture, touch up, and resize using photo editing softwares. You can download the free Google's Picasa or Irfanview if you don't have one. Save the picture in your computer or upload it onto an image server.
Login to your Dashboard. Go to Template -> Page Elements. Click to Edit your Header.

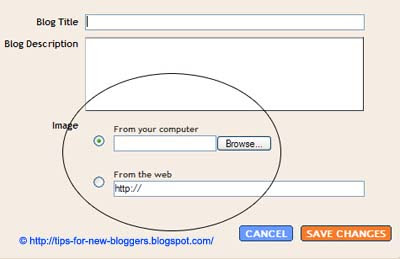
You will see that you can now upload an image onto your Header either from your computer or from the web. After uploading the image, Save the changes and View your Blog. If you are happy with the picture, go back to Edit your Header again.
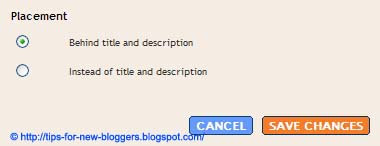
This time, you will see under the image further options on “Placement” of the image.

If you choose “Behind title and description”, the image will appear as a background and whatever you type as your title and description will be visible on the face of the image. With this option, only the title links to your main index page but the image does not.
Login to your Dashboard. Go to Template -> Page Elements. Click to Edit your Header.

You will see that you can now upload an image onto your Header either from your computer or from the web. After uploading the image, Save the changes and View your Blog. If you are happy with the picture, go back to Edit your Header again.
This time, you will see under the image further options on “Placement” of the image.

If you choose “Behind title and description”, the image will appear as a background and whatever you type as your title and description will be visible on the face of the image. With this option, only the title links to your main index page but the image does not.
No comments:
Post a Comment